
Estimated reading time: 2 mins
For most people, knowing where to start when it comes to setting up their wireless router is often a challenge, and the reasons are not far fetched. Sorting through a series of cables, ports and other components stashed in the best router will leave a lot of people scratching their heads.
For the most part, the most natural thing to do is to follow the instructions. Every router is different, and the steps you will take to set them up differs from model to model. Every model comes with a set of instructions on how to set it up especially the best router under 100, but if you can’t find it, you can use this ‘one-size’ fits all instructions to set it up.
This short tutorial will go through the process of setting up a router in your home.
Step 1: Connect the Router to your Modem and Laptop.
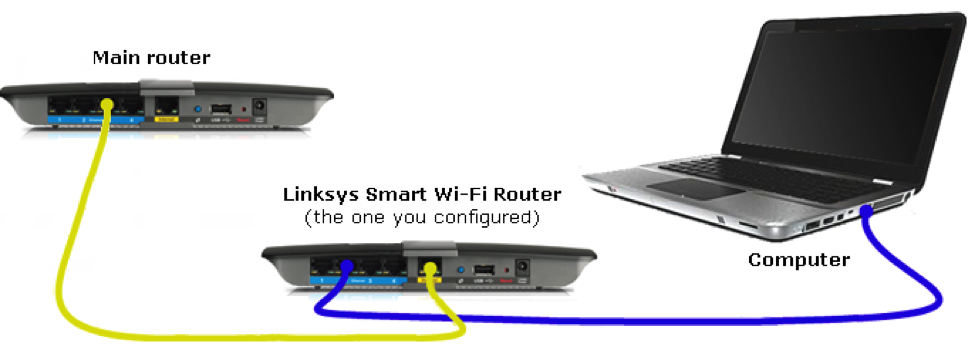
Source: Linksys Smart wifi
This is the first stage, and it is quite essential. Leave the router out of the power outlet but connect it to your modem and then connect the modem to the WAN port using Ethernet cable. Plug the other Ethernet cable into your router’s WAN port.
2.Find the Configuration Page.
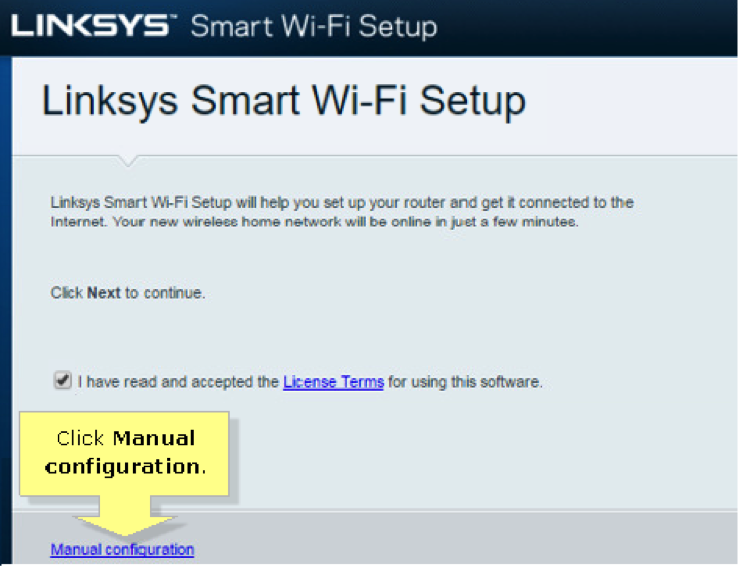
Source: Linksys Smart wifi
The router might take a little while for it to start up but once it does, the laptop will be connected to the LAN. Check this by locating the networking icon on the left of the stock. This is how you create a local network. Once the laptop is connected, head over to the router’s configuration page. This is where you will configure your router’s settings.
Step 3: Username and Password will be required

Source: Linksys Smart wifi
For some of the top routers like the Netgear AC1750, the admin username and admin password come with it. For some new ones, they don’t come with it. Whatever password you choose has to be unique and secure so no one can enter your network to do nasty things. In some cases, the configuration page will ask you to put in the username and password. What it is requesting
Step 4: Set up your Wireless Network
This step can be overwhelming, but it is simple if you can locate what you need – Wi-Fi. Most routers have a section devoted to this on them, but the names differ. Some call it “Wireless” and sometimes, they call it “Wi-Fi” or “Radio”. Once you locate it, you should find a box called “SSID” which allows you customize your wireless network with a name. Once that is settled, we then work on the security settings. WPA2 security is the way to go as anything below that makes it easy for hackers to get into your network.
And you’re off to a flying start.
If you follow these steps, your router should be ready to use by you and other members of your family. Of course, different brands have different configuration processes. Like the way, you configure the Asus AC5300 will be different from the way you set the Netgear Nighthawk AC1750 but the fundamental steps still hold true for all of them.