
Estimated reading time: 4 mins
In this post we will show you the steps to setup WooCommerce in your WordPress website. We assume that you already know how to buy a domain name and install WordPress on it. If you don’t have idea on this then read this post. If you want a fully functional eCommerce website then WooCommerce can be your perfect solution.
Why WooCommerce?
- Till now it’s free to use.
- Most popular eCommerce platform with well-rated reviews.
- Hassle-free configuration.
- It is fully compatible with most of the WordPress themes & WordPress versions.
What can you sell using it?
- Different products that exist physically.
- Digital Products like tools, downloadable files, etc.
- Affiliate products
- Services
Let’s take a look at the steps to setup the WooCommerce Plug-in:
Step 1: Install WooCommerce from Plug-in Store
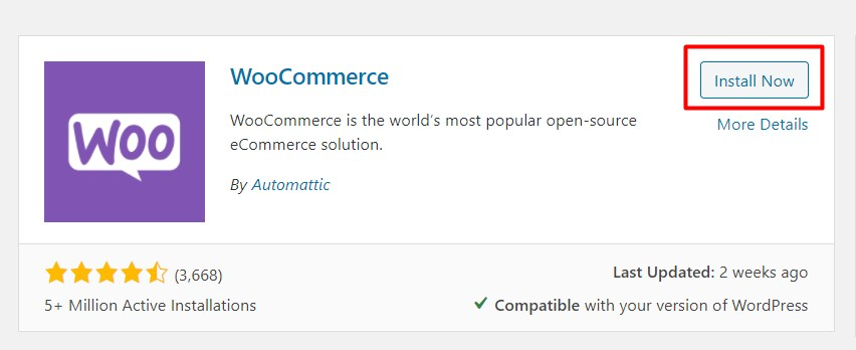
On the left side WordPress dashboard click on plugins then add new. After searching it you will find the product. Just click the install now button that will be visible on the right side of the product. When the installation will be completed the button will be changed to activate option. After the activation a setup wizard will be displayed.
Note: Four important pages (Shop, Cart, my account, Checkout) creates automatically after the plugin activation. All the products will be displayed on the shop page automatically. You can customize it and use it as your homepage.
Step 2: Setup Store Details
Don’t skip these steps after activating the plug-in. These are some useful information you need to fill up. In the store details write your company’s address.

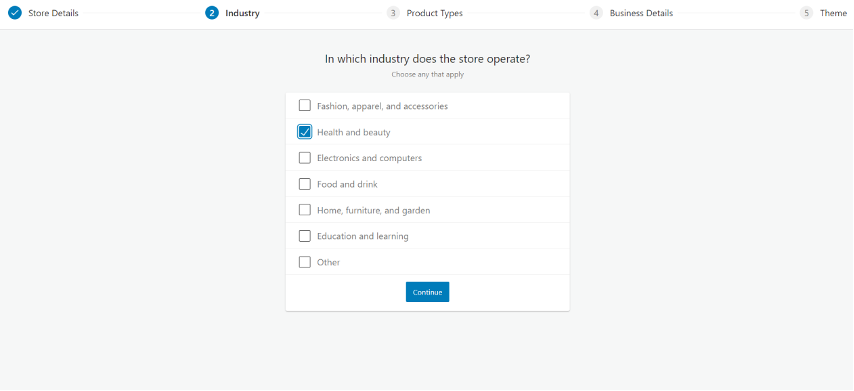
Step 3: Select the Industry Type
You need to fill up the industry type for your business in this step.
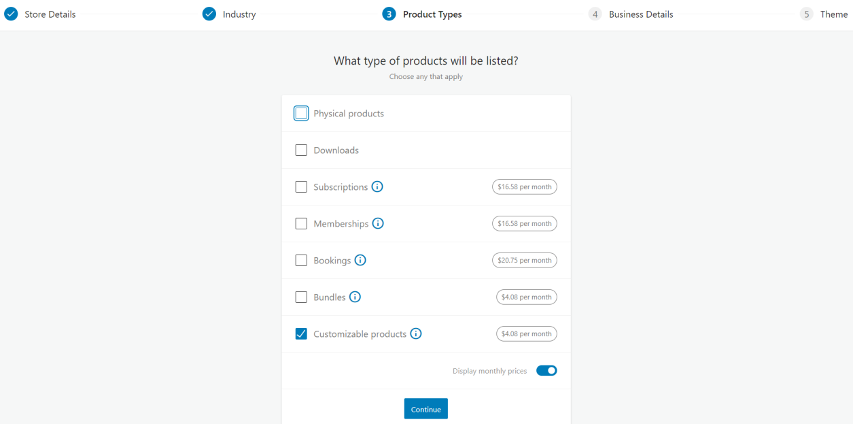
Step 4: Select Product Type
In the next step, select the product type that you want to sell. There are different options like a physical product, subscription or others.
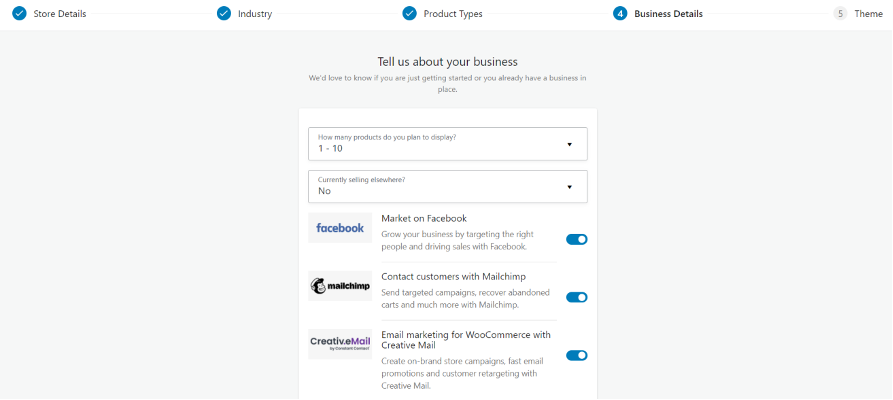
Step 5: Business Details
Here you can fill up the number of products you want to sell and other places where you are selling products recently.
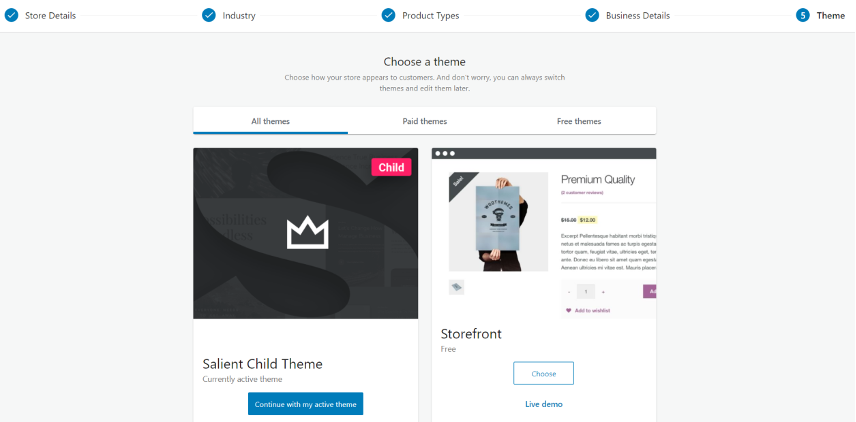
Step 6: Select Theme
If you already selected a theme for your store then just continue with the activated theme. Otherwise search for a catchy theme and install.
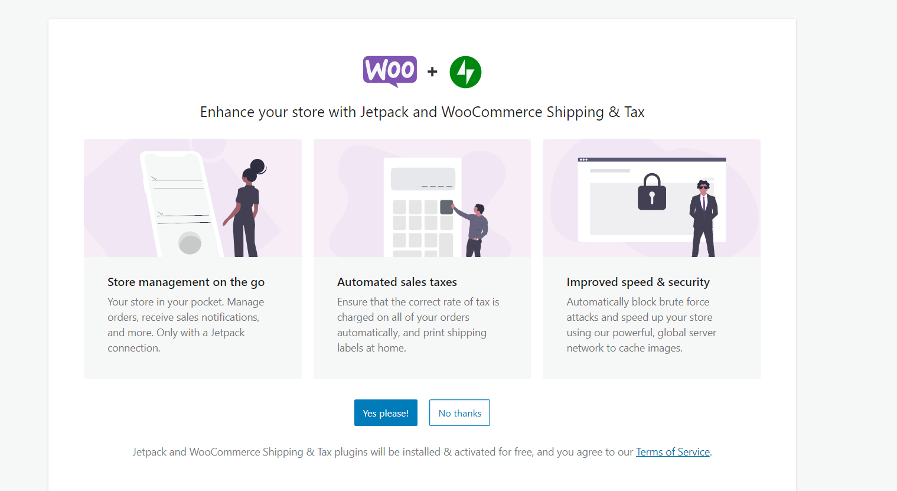
After the theme section an add of some plugins will be displayed. You can install them to enhence your store performance. Otherwise click on “no thanks” & move on the next step.
You have completed the store details related steps now. You will be redirected to a page where you will find some important options like tax details or payment method that must be filled up.
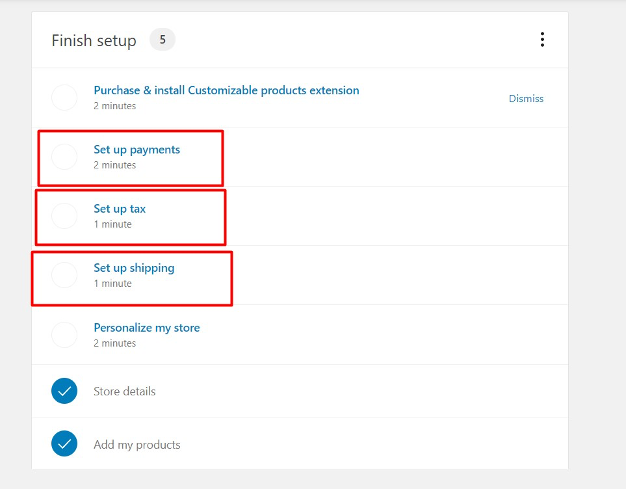
Step 7: Setup Payment Method
Next you can setup the payment method. There are Different kinds of payment option Like Stripe, PayPal, eWay, direct bank transfer. For cash on delivery just switch on the button.
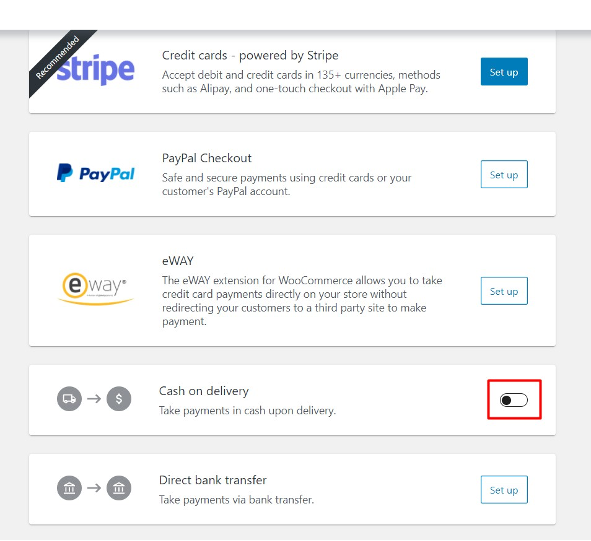
If you select PayPal, a plug-in will be installed automatically. This plug-in will connect the WooCommerce with PayPal.

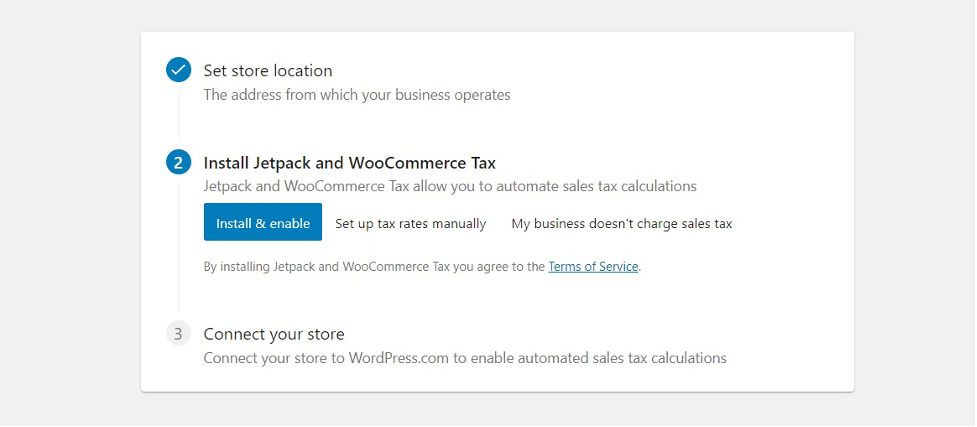
Step 8: Sales Tax, optional
If your business charges sales tax then this step is for you. As you already set up the store location, you can automate the tax calculation by installing Jetpack & WooCommerce tax plug-in and connecting your store with WordPress. Also, there is another option available to set up the tax manually.
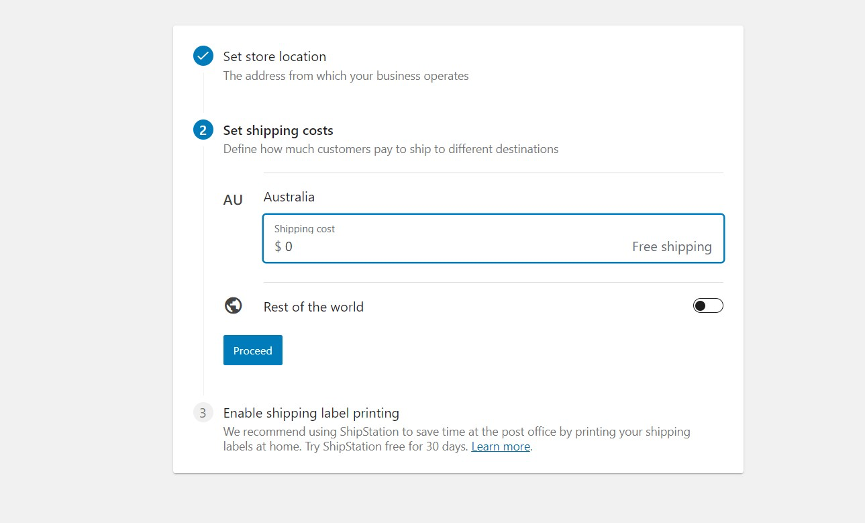
Step 9: Shipping Details
If you are selling physical products that need to be shipped then you must set up this step before adding products. For different location you can add the shipping charge. Left this section unchanged for free shipping.
These are the most essential steps to do before adding products in your store. From the WooCommerce setting you can edit all the changes that you made earlier. Now it’s time to add products on your store.
How to add a product on WooCommerce perfectly?
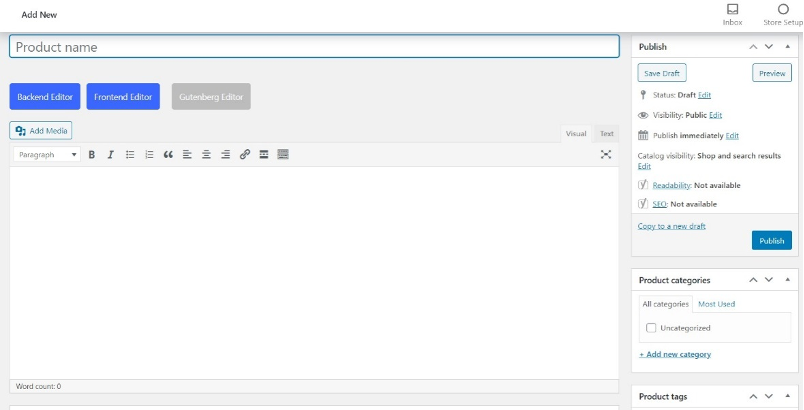
You can add a product by clicking on the WooCommerce home or the below products options below the WooCommerce in the left site WordPress dashboard bar.
Enter the product title, description, short description feature/main product image, product tags, category, gallery image, image alt text. Product related data like regular price & offer price, shipping information like weight, height information, etc.
Make your product search engine friendly:
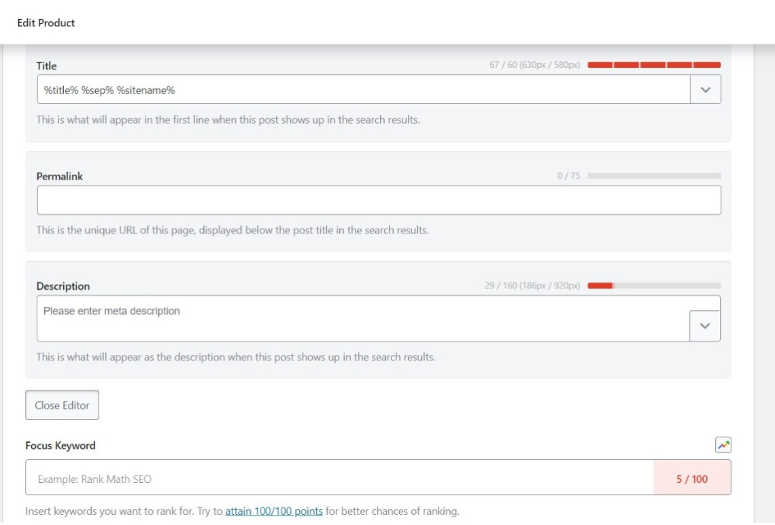
You should optimize your product for search engine to rank well in SERP. Use plug-in like Rank math or Yoast SEO to input different tags that helps search engine to better recognition of your product. When adding products, you will find the edit snippet section by scrawling the page down. Here you can add SEO title, customized permalink, Meta description that will be visible on search result. Another important thing is focus keywords of your page that you can add here.
Bonus Tips:
When you are adding products on WooCommerce, structured data is generated by default which helps search engine to display the product as form of rich snippet. By using this tool https://search.google.com/test/rich-results you can find out if you are missing some useful data that restricts your product to be appeared on search engine as a perfect product format.